Kitbashing has become a wildly popular art form in recent years. And it's been a small part of HMW as well with a few of us kitbashing our own characters.
We've had a few new faces lately and I thought some of them might be looking to learn how to kitbash, or just pick up some general tips. So consider this a little getting started guide.
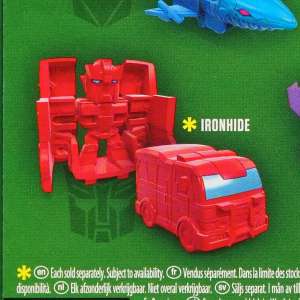
Now when it comes to kitbashing and for people starting out I ALWAYS recommend finding a junker on E-Bay and working on it. You get a trashy figure for what should be a cheap price. And I especially find the Seeker and Sideswipe G1 molds the best as they're easy to disassemble and reassemble.
Recently I snagged a near complete (missing his fists but I had them to spare) G1 Dirge for $15AU off E-Bay. He arrived earlier in the week and you get what you pay for. His stickers were stuffed and many of his joints are loose.
The first thing you have to do of course is to clean him up. I removed the stickers and because of the age, and residue left came off easy with methylated spirits.
Once cleaned up you can start on taking him apart.
I started by seperating the nosecone/cockpit from the main body. This is held in place by a small pin, which was so loose on Dirge it actually fell out. However if you need to remove it, it's quite easy. You need to work out which is the head of the pin, and which is the bottom of the pin.
If you haven't worked it out, the first pic is the head of the pin as it has the larger surface. So with a nice pointy object you can poke down and against the base of the pin, give it a tap until the pin comes out, and this will be the result.

Next I took apart the main body. This is done by removing the three screws in the chest.

Once they're out you end up with this lovely assortment of parts.

A little tip (not one you necessarily need to follow) is to put the screws back in once everything's taken apart. This saves you from losing them. Plus in the case of the plastic part of the chest it's a handy way to elevate it when painted.
Now as you saw in previous pics the diecast part of the chest was fairly pitted so I wanted to clean it up before I started on painting it. Using my handle little Dremmel tool and a few small flexible sanding discs, I got the bulk of it back to bare metal.

Some areas I just couldn't get into but they weren't damaged. Once i'd finished I made sure I gave it a good clean ready for priming. Because it's diecast I will be using a metal primer.
And that's where i'm at today! Keep checking back for updates and if you have any questions feel free to ask!
I'm also taking suggestions on names.
01-08-2010 UPDATE 07-08-2010 UPDATE
First up on the on-going dissection is the cockpit/nosecone section.

Nice chew marks huh? Yeah, that's a common problem i've found with 20+ year old seekers. That rubber bit also needs to be removed before you can fully take it apart.
I've found the best way to do this is to warm it up. Just hot tap water does the trick. Doesn't need to be super hot, in fact you can leave it under the water for a minute or two then just pry it off.
Once it's off it's just a simple case of removing one screw and the rest comes apart.

Take note of the small split washer. This goes between the two sides where the pin that connects the cockpit to the chest. Expanding this little washer is a good way to tighten up the cockpit in robot mode.
Next on the list is the legs.

First thing you have to do is get the thruster off. A nice sharp blade between the thruster and the leg and a little bit of wiggling/prying will get it off.
And just like before, removing a screw will take it all apart.

And last for today is the arm. One screw here removes the "shoulder" joint. The arm however stays together. And it's a bastard to get apart as there's a plug inside at the bottom of the arm that is difficult to remove. I found the best way was to slide a knife in at the top (easy to pop up) and work it down, WORKING SLOWLY. I can't emphasise you take this slowly as I have snapped the plug on others in the past. It will eventually pop out though, you just have to be patient.

Last but not least before painting, always give the parts a wash. This is especially important for original G1 figures as they tend to accumulate a LOT of dirt